How to Install CCTV for Beginners – Step-by-Step Guide to Setup
Learn how to install CCTV cameras for home or business security. This beginner-friendly step-by-step guide covers planning, setup, wiring, and monitoring.

CCTV (Closed-Circuit Television) cameras are one of the most effective ways to protect your home or business. They not only deter intruders but also provide real-time monitoring and evidence in case of an incident. If you’re new to security systems, installing CCTV may seem complicated—but with the right guidance, it’s easier than you think.
This step-by-step guide will walk you through everything you need to know about setting up your own CCTV system.
Step 1: Plan Your CCTV Setup
Before purchasing or installing cameras, ask yourself:
What areas need monitoring? (entrances, driveway, backyard, hallways)
How many cameras are required?
Do you prefer wired or wireless cameras?
Do you want indoor, outdoor, or both?
💡 Pro Tip: Place cameras where they cover the widest angle and have clear visibility.
Step 2: Choose the Right CCTV Equipment
A standard CCTV setup includes:
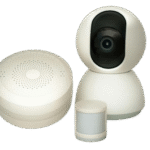
Cameras – Dome, bullet, or PTZ (pan-tilt-zoom).
DVR/NVR Recorder – DVR for wired systems, NVR for IP cameras.
Hard Drive – Stores recorded footage.
Cables & Power Supply – For wired systems.
Monitor/Smartphone App – To view live or recorded footage.
Wireless cameras are easier for beginners, while wired systems offer more stability.
Step 3: Mount the Cameras
Use the mounting brackets provided with your camera kit.
Place cameras at least 8–10 feet high for better coverage.
Angle them slightly downward to capture faces, not just the top of heads.
Avoid pointing directly at light sources to prevent glare.
Step 4: Run the Cables (For Wired Systems)
Drill holes to pass cables from the camera location to the DVR.
Secure cables along walls or ceilings using clips.
Connect the camera cable to both the DVR/NVR and the power supply.
👉 If you’re using wireless cameras, you only need a power outlet near the camera.
Step 5: Connect the DVR/NVR
Plug cameras into the DVR/NVR.
Connect the DVR/NVR to a monitor or TV using HDMI/VGA.
Attach the hard drive inside the DVR for recording storage.
Power up the system.
Step 6: Configure the System
Adjust camera angles for maximum coverage.
Set recording modes (continuous, motion detection, or scheduled).
Secure your system with a strong password.
Connect DVR/NVR to the internet for remote viewing on your smartphone app.
Step 7: Test the System
Check if each camera is recording properly.
Test both day and night vision.
Walk in monitored areas to see if motion detection works correctly.
Tips for Beginners
Start with 2–4 cameras and expand as needed.
Invest in cameras with night vision and weatherproofing for outdoor use.
Regularly clean the camera lenses for clear video quality.
Backup your recordings to the cloud or an external drive.
Final Thoughts
Installing CCTV for beginners may seem overwhelming, but once you follow these steps, it’s a simple and rewarding process. Whether for home security or business protection, a properly installed CCTV system provides safety, evidence, and peace of mind.

